Adding STA logger data to QGIS without the need for downloading

It’s no secret, the STA logger platform is built on the trusted and reliable foundations of Esri’s ArcGIS software. This brings a wealth of benefits such as security, reliability, feature richness, and decades of experience in the geospatial world.
It also means that if your organisation also uses Esri software, that you can seamlessly integrate STA logger data in to your GIS. For example, a desktop user can simply use the “Add data” button in ArcGIS Pro to display an up-to-date feed of their STA logger data in their desktop experience like we discussed in a previous blog. This means that every time a user opens ArcGIS Pro, they are getting the latest data, without the need to export, download or synchronise anything. It can be displayed and saved in a project alongside their organisations authoritative data for map production or it can be further processed for analytical purposes.
And while over 350,000 organisations across the world use Esri’s software, some use other GIS software like QGIS. But that doesn’t mean that QGIS users don’t enjoy the same level of integration as ArcGIS users. They too can bring their STA logger data in to their GIS project without the need for download. This article on the QGIS website walks through the entire process, but it has a lot of steps that you don’t need to know. Below is a stripped down version of what you need to do in QGIS. But if you get lost, walking through the QGIS article might be helpful.
Authenticate
First we need to setup an authentication within QGIS so it can request information from ArcGIS, securely.
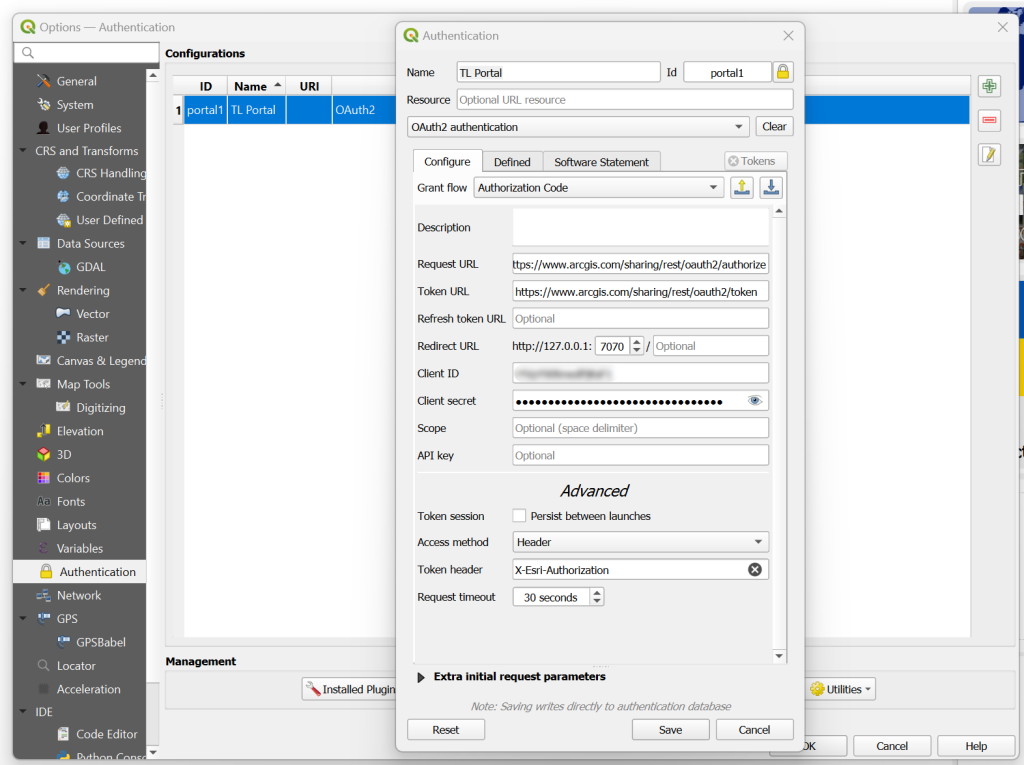
From QGIS, select Settings > Options > Authentication tab. Then select the green plus button to setup a new authentication. At this point, you may be asked to create a “Master Password” when you first create an authentication setup. If so, create a secure password there before continuing.
Then you must give your portal connection a name in the “Name” field. We used “TL Portal”. You then need to “unlock” the “Id” field by clicking the little padlock icon, and then you’ll be able to enter a standard ID to identify the Portal. The Id field is very strict, and will only accept a 7 letter string. Feel free to copy ours which was “portal1”. Then select the Authentication Type drop down menu and select “OAuth2 Authentication”. Fill in the rest of the details as follows:
- Grant flow: set to “Authorization Code”
- Request URL: https://www.arcgis.com/sharing/rest/oauth2/authorize
- Token URL: https://www.arcgis.com/sharing/rest/oauth2/token
- Refresh Token URL: leave empty
- Redirect URL: leave as the default http://127.0.0.1:7070 value
- Client ID: You will need to get this from support.
- Client Secret: You will need to get this from support.
- Scope: leave empty
- API Key: leave empty
- You’ll also need to set the “Token header” option under the “Advanced” heading. This needs to be “X-Esri-Authorization”.
Click “Save” and close the options.
Add connection details
For the next part, you will need to find your feature service URL. You can get this at the bottom of the Item Details for your STA logger layer. If this means nothing to you, then you can always reach out to support for help getting your feature service URL.
Once you have it, open your QGIS project, select the Layer menu, go down to Add Layer and then select Add ArcGIS REST Server Layer.

In the data source manager, select New to create a new connection.
First give your connection a name like “STA logger data”. Then paste the Feature Service URL that you get from support in to the URL box. Then set the Community endpoint URL and Content endpoint URL to:
- https://www.arcgis.com/sharing/rest/community
- https://www.arcgis.com/sharing/rest/content
And finally, under configurations, select the authentication that you setup previously, from the drop down menu. Click “OK”, setup is complete.

Adding STA logger data to QGIS
The setup is complete. Now to add the STA logger data to QGIS, you go to add a layer and select “ArcGIS REST Server” like mentioned above. Find the connection you setup, and select “Connect”. You will see the services available to you in the box below. Selecting one will open the browser requiring you to sign in.
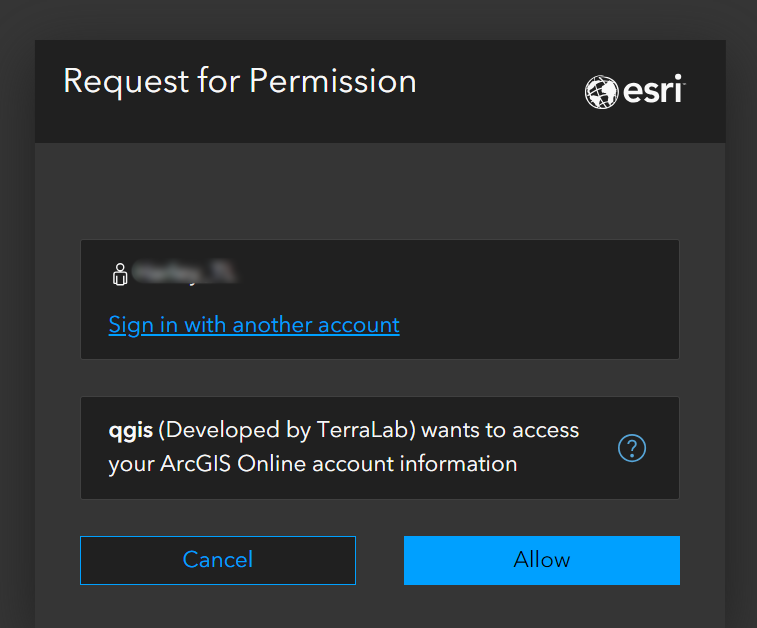
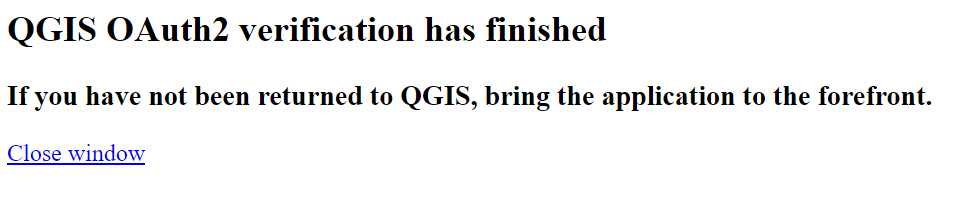
Once authenticated, you will receive this message:
You can now select which service you want from the available services in the Data Source Manager. Highlight your STA logger data and click “Add”.
It may take some time, but eventually the data will be in your map frame. To make it simpler for next time, save your project for future use and your STA logger data will be there, completely up to date.

So, to summarise, there are three things you will need from TerraLab: The client ID, client secret and feature service URL.
Recent Posts

STA onboarding
Read More »
So, why the STA logger?
Read More »
Post processing STA Explorer HA data
Read More »
Accurate tree planting mapping – Using the STA explorer HA
Read More »